There’s something about lowered cars that resonates with enthusiasts across the globe; so much so that if a car is dropped on a nice set of wheels, it’s an instant giveaway of the owner’s interest in auto culture.
Out of all the different ways you can drop your ride height, installing lowering springs is definitely the most hassle-free method, but only if you do it right.
Continue reading to learn the dos and don’ts of installing lowering springs.
Lowering Springs vs. Coilovers
The general advice is “coilovers for adjustability, lowering springs for the drop”, which makes sense. Coilovers are more expensive than lowering springs, especially those from brands like KW, Fortune Auto, Ohlins, and H&R.

You’re much better off with lowering springs if all you want is a firmer ride and a nice, understated drop. Especially if you don’t want to spend the extra cash unless you have to.
Coilovers are something you should use to fine tune your suspension settings to suit your driving style. They allow you to:
- Tune your rebound and compression damping
- Adjust your ride height down to the millimeter
- Not worry about matching the coil spring to the damper
- Adjust your camber and caster angle
Many people who drive cars that feature some type of adaptive suspension system prefer lowering springs over coilovers because it allows them to retain the factory tech. BMW’s Electronic Damper Control (EDC), for instance.
Height adjustable lowering springs are an excellent choice for applications like these.

It’s worth mentioning that, in many cases, a decent lowering spring and shock combo will outperform a similarly priced set of coilovers.
Cheap coilovers with seemingly infinite levels of adjustment, a long list of features, and bold claims about performance usually turn out to be gimmicky and poorly designed.
If you’re on a budget, we recommend avoiding those and buying a quality pair of lowering springs and shocks instead.
How to Install Lowering Springs the Right Way
Lowering springs work out great when done right, but they tend to get a bad rap because most people don’t install them correctly.
That includes choosing the wrong spring rate, lowering the car more than necessary, and most importantly, not matching the spring and damper.
Not to mention ignoring all the unwanted changes in suspension geometry and wheel alignment that come about after lowering your ride height.
With that in mind, here are some of the things you can do to ensure you get a drop in ride height using lowering springs, without sacrificing ride quality.
Match Your Springs and Shocks

A common mistake people make when installing lowering springs is that they keep their factory struts. This doesn’t always work out because factory shocks are designed to work at a certain ride height, and they’re valved for a certain spring rate.
Aftermarket lowering springs are typically shorter than OEM or OEM-replacement springs. So by installing them on stock shocks, you’ll be underutilizing your damper’s travel length.
In other words, your shocks will by default sit lower in their travel-range in contrast to where they would be at factory ride height.
Consider the difference in length between the factory spring and the lowering spring. The weight of your car will compress your damper by that amount when it’s dropped on the lowering springs.
The reason why this is a problem is that dampers are position sensitive. This means they’re valved to offer different levels of damping force at different zones of their travel range.
Many modern dampers are also velocity sensitive, that is, they respond differently depending on the speed with which they encounter a force.
The initial damping rate of your factory shocks is generally firmer as it is designed to deal with serious bumps.
By installing a shorter spring on your stock shock, you’re essentially robbing it of much-needed compression travel, making it more likely to bottom out.
Letting your suspension bottom out often will wear it prematurely. That’s why you’ll hear of factory shocks giving out a few months after running them with lowering springs.
Choose the Right Spring Rate

Spring rate is a unit used to describe how much weight will compress a spring by a certain amount. Typically, spring rates are denoted in imperial units (lb/in), and in metric units (kg/mm), they’re followed by the letter “k”.
For example:
10k = 10 kg of weight needed for each 1 mm of compression
560 = 560 pounds of weight needed for each 1″ of compression
10k becomes 560 because converting spring rates from metric to imperial requires you to multiply the value by 56.
The spring rate you should choose is a matter of personal choice, however, each car has a recommended range that you shouldn’t exceed.
Engineers take into account the car’s corner load distribution, overall weight, drivetrain configuration, intended use, and several other factors to come up with the perfect spring rate.
Factory shocks aren’t valved to handle stiffer rates that are usually seen on aftermarket lowering springs.So if you substantially increase your spring rate without matching it with the damping ratio of your shock, it will impair your car’s handling.
This could be a problem with some aftermarket shocks too, because manufacturers rarely publish data such as damping ratios.
Even if they did, finding the right spring rate and shock combo would require you to perform calculations involving natural frequency, damping ratio, motion ratio, corner weight, sway bar stiffness, and wheel rate.
Doing so will give you a ballpark range of spring rates that will work with a certain set of shocks. You’d also have to consider your driving style, track layout, driving conditions, tire type, surface conditions, and much more.
That’s a lot of work. The easiest way to find the right shock and spring combo is to buy parts that are made specifically for your car. You’ll also come across the manufacturer’s recommendations for ride height and spring rates to make your selection easier.
Get an Alignment

Did you know that when you reduce your ride height and ground clearance, for each inch that you lower it, you lose approximately -0.75° of camber?
Even though some negative camber can help with tire rollover and maximizing contact patch, it’s not ideal if it happens without you knowing. Any changes made to your suspension geometry wheel alignment need to be intentional. Unless you’re going for a stance build.
Lowering your car also lowers the center of gravity, which affects the roll center and weight transfer characteristics. Combined with the unwanted camber gain, it can really throw off your handling.
If you want the best handling performance out of your car after lowering it, getting an alignment to correct and offset any unwanted changes in your suspension is highly recommended.
Progressive vs. Linear Springs

Lowering springs are typically classified into 3 types:
- Linear
- Progressive
- Dual rate
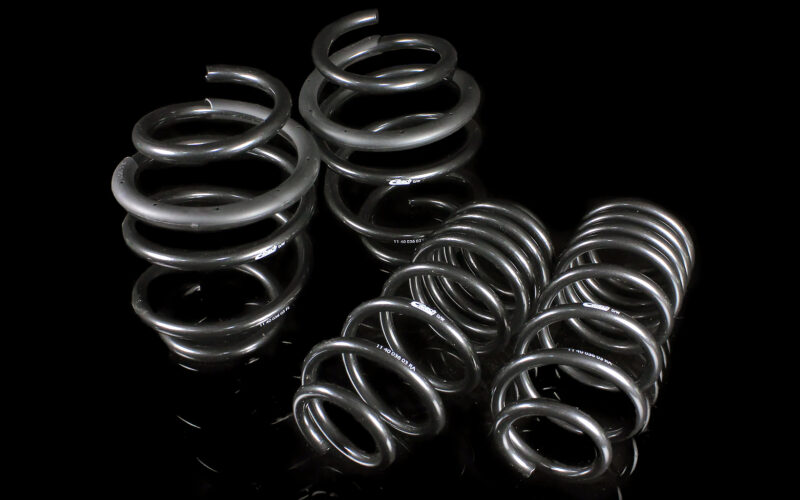
Linear springs have a consistent rate throughout their travel length; they also have evenly sized gaps between each coil.
For track use, linear springs are preferred because of how predictable and consistent they are, which is ideal on a smooth track built for race cars. The linear rate also makes it easier to calculate how the spring will behave under certain conditions.
Progressive springs have varying rates that get stiffer as they compress. For example, the first inch of compression might require 180 lbs of weight, and 320 lbs for the next inch. As the spring compresses more, it gets stiffer.
This makes it more compliant with irregular surfaces at low to moderate speeds, while still being able to deliver good performance through quick corners. They have uneven gaps between their coils; that’s one way to distinguish the two types visually.
Street cars, on the other hand, work better with progressive springs because of their dual nature — a perfect balance for both smooth and irregular surfaces.
Dual rate springs are more extreme in the sense that they’re like two linear springs joined together. One part of the spring is dedicated for a softer ride, while the other part is stiff and favors performance.
Unlike progressive springs, the transition between soft and stiff is more extreme with dual rate springs, making them more adaptable.
Get Low
If you’re unsure what products work best for your car and driving style, definitely consider connecting with other enthusiasts through car-specific forums and checking out which setups are most popular.
Installation is easy, just be sure to use a good quality spring compressor when removing your stock springs — can never be too careful around loaded springs.
Ready to get your very own lowering springs on order? Check out our range of products today!


