Of all the kinematic parameters that characterize the geometry of your suspension, camber arguably takes the cake, particularly when it comes to optimizing load transfer.
Load transfer is the cornerstone of suspension dynamics. Considering how substantially it affects traction across all 4 wheels, optimizing it is essential, especially for race cars. One way people do this is by installing a camber kit.
Camber kits allow you to easily amend your wheel alignment specifications and suspension geometry. While you can get away with the factory camber angle, being able to fine tune it opens up avenues not only for better handling but also for incorporating other suspension modifications.
Here you’ll find some of the best camber kits on the market along with everything you need to know before installing one.
Reasons to Install a Camber Kit

Camber kits are particularly useful if your desired alignment specifications cannot be attained through the factory adjustment range, which typically maxes out at 1.5°.
In this case, you can either source individual parts such as camber plates, adjustable suspension arms, and eccentric bushings, or you can buy a readymade kit and save a ton of time on research. Unless you’re after a very specific result, of course.
Here are some of the reasons why you should consider installing a readymade or curated camber kit.
Camber Correction After Lowering Your Ride Height
Barring trucks and some SUVs, almost every production car utilizes some form of independent suspension with at least one lower control arm. This layout allows opposing wheels to move up and down independently, which is pretty neat but there’s one caveat.
Since the control arms hinge from their own individual mounting points and are meant to travel through pre-defined arcs (one shorter than the other), they cause the wheels to gain and lose camber as they articulate. This is referred to as camber gain or dynamic camber.
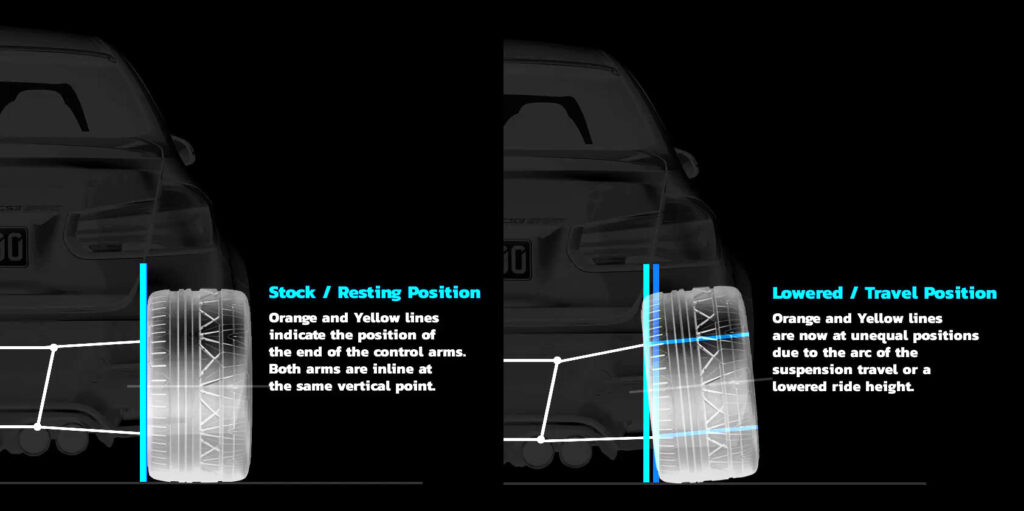
Consequently, when cars are lowered, the wheels gain a certain amount of static negative camber, which not only throws off the dynamic camber but also causes uneven tire wear, tramlining, and reduced straight-line braking performance among other things.
Depending on the car and how much you’ve lowered it, you may have enough factory adjustment to be able to correct the unintended negative camber gain. Especially if you’ve lowered by 1.5″ or more.
Camber kits allow you to revert to an appropriate camber angle and offset any undesirable changes resulting from a lowered ride height.
Optimizing Contact Patch and Tire Rollover
If you intend on visiting the track more often, installing a camber kit is highly recommended if you want to extract more grip from your tires under hard cornering conditions.
Most track cars run some amount of negative camber, often hovering between -2° and -3°. This is because the negative camber helps offset during tire-rollover when banking into a corner.
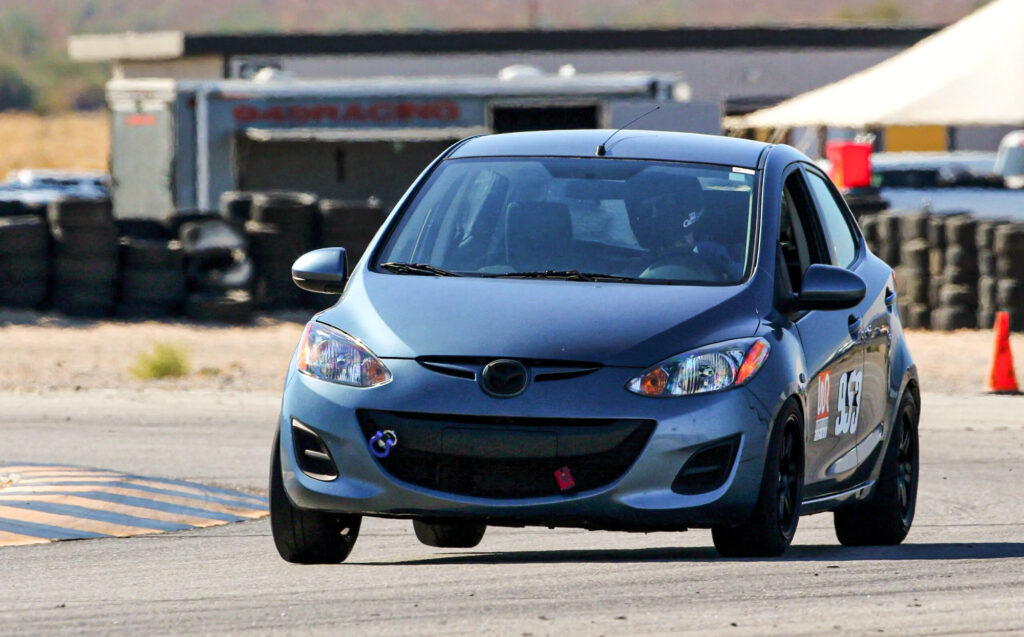
Think of roll-over as the degree to which the edges of the tire tread become part of the contact patch when the car is under cornering force. In this scenario, the outer part of the lead tires do most of the heavy lifting while the inner sections are comparatively underutilized.
Adding a tiny bit of negative camber offsets that phenomenon and flattens the contact patch, resulting in improved traction when it matters the most.
For this reason, it helps to have a camber kit installed on your track car. It’ll let you go beyond factory adjustment, which you will need to, considering how most track cars are lowered by default.
Tire Wear Prevention
The first thing that goes wrong when you lower your car without bringing the camber angle back to factory spec is that your tires will start wearing out on the inside, causing uneven tire wear.
However, this can be attributed to misalignment in general and not necessarily negative camber. Most of all, it’s actually the toe that does a number on your tires and not necessarily camber.
Building a Drift Car

All the rules change when building a drift car. To put things into perspective, here’s a list of approximate camber values suitable for certain racing disciplines and driving styles:
- 0° to -0.5°: Drag racing
- -1° to -2°: Spirited daily driving
- -2° to -3°: Track days and competitive use
- -3° to -6°: Drifting
On paper these changes may not seem like a lot but even 1° can make a significant difference especially when you’re pushing the car to its limit.
Because drift cars spend so much time driving sideways, banked hard onto the outer edges of their tires, they need even more negative camber to flatten out the contact patch compared to cars set up for grip driving.
It’s worth mentioning that -3° to -6° is applicable to the front wheels, rear wheels should have no more than -1° of camber.
Setting Up a Stance Car

There are no rules when you’re going stancey. Some people think it’s silly to run destructive amounts of camber for the sake of aesthetics, others say its art on the edge of the abyss. If you subscribe to the latter school of thought, then you absolutely need a camber kit.
-7° to -10° and more is not unheard of in the stance world. Under -10° is still manageable but it’s purely form over function. Any more than -10° and you’re asking for wheel damage. It’s going to look sick though.
What Do Camber Kits Include?
Even though all camber kits have a common goal of making it possible to adjust camber beyond factory spec, they do it differently. It depends on your car and your suspension type.
It also depends on how expensive and comprehensive the kit is. The usual suspects include camber plates, adjustable front and/or rear control arms, camber botls, and eccentric bushings.
Camber Plates
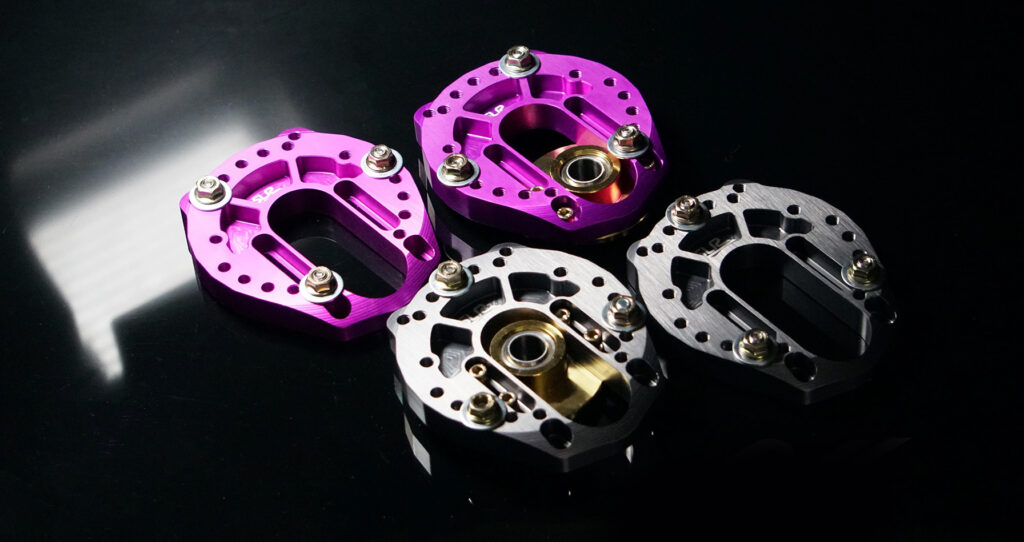
Think of camber plates as modified, CNC-machined, factory replacement strut mounts with integrated sliders where your strut or coilover attaches. These allow you to reposition your coilovers or strut in a way that changes the camber and caster angle.
They have markings that serve as a visual guide so you’ll know how many degrees of angle you’re adding or subtracting. With these installed, all it’ll take for you to change your camber is a few twists of the adjustment bolts with an allen wrench.
We recommend combining these with coilovers, although they can be used with your stock struts as well, unless the spring perch is too large, since it’ll limit your adjustability due to clearance limitations.
Adjustable Control Arms
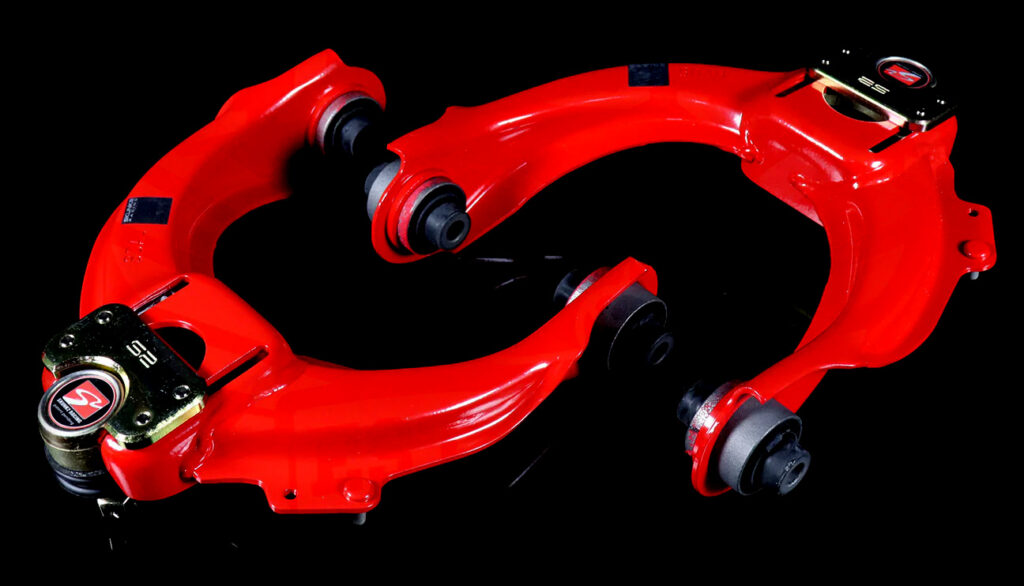
Most factory control arms can only be set at one position. Aftermarket control arms are meant to replace these and provide additional adjustment for various wheel alignment angles, not just camber.
Front adjustable control arms are similar to camber plates in a way; they feature sliders that allow orient your suspension to add or remove camber. By doing so, you’re effectively changing their length.
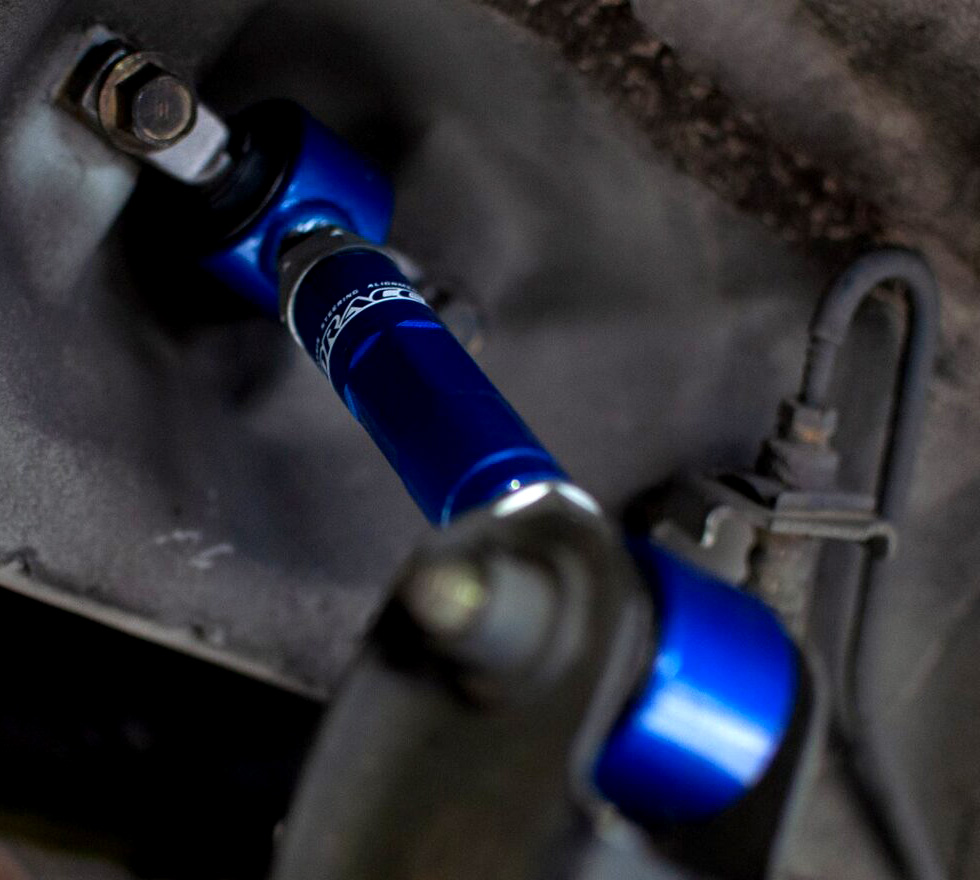
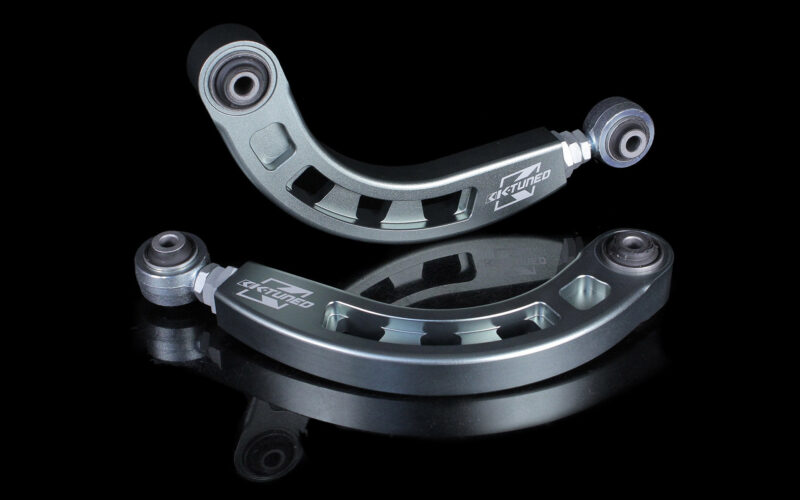
Rear aftermarket control arms that allow for camber and toe adjustment typically resemble a tie rod, as opposed to the wishbone design of front control arms. These feature threaded collars or adjustable rose joints that allow you to lengthen or shorten them as needed.
They’re particularly useful on cars like the 96-00 Civic where the rear suspension has a pretty steep camber curve, which means it gains a considerable amount of negative camber in the rear when lowered.
It’s worth noting that all camber kits look slightly different and contain different parts depending the car they’re made for, the type of suspension they’ll be installed on, and their orientation (front vs rear).
Camber Bolts
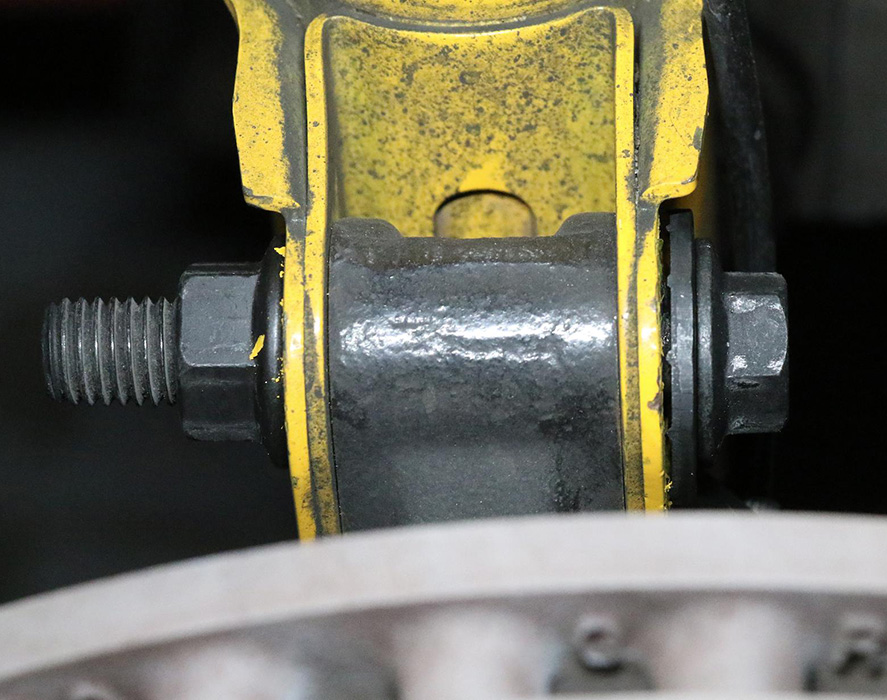
Camber kits don’t include camber bolts, unless it’s specified that they’re “camber bolt kits”. Most of them only feature a pair of adjustable control arms and some only include camber plates.
Production cars with MacPherson struts rely on camber bolts for wheel alignment purposes. These offer no more than a couple of degrees of adjustment. However, aftermarket ones may have marginally higher ceiling for adjustment and feature locking mechanisms which ensure zero slippage over time.
These are simple bolts that feature an offset washer and an eccentric lobe, the likes of which you see on camshafts.
Turning the bolt affects the alignment of the steering knuckle or the lower control arm if it’s a MacPherson strut. On SLA suspension, these are used to re-orient the upper and lower arms.
Eccentric Bushings
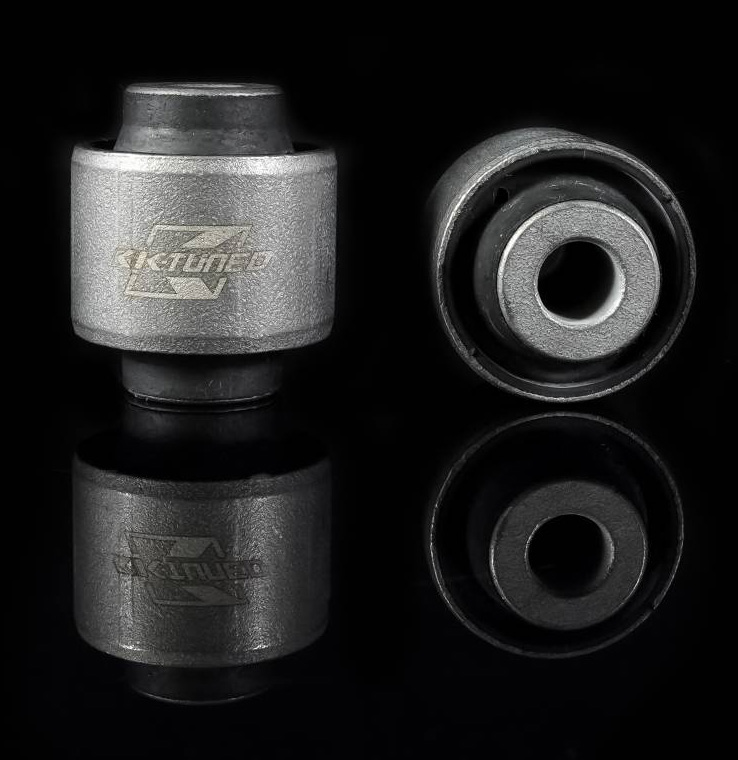
These are meant to be installed into the upper and lower steering knuckle mounts, allowing about 2 more degrees of camber compared to the stock setup.
Unlike OEM concentric bushings, eccentric bushings feature an offset design that allows you to push the steering knuckle outward or inward.
Aftermarket eccentric bushings are perfect for fine-tuning your camber angle. Consider them a finishing touch rather than a standalone solution. For a thorough adjustment, it’s advisable to use camber plates or adjustable control arms.
Shims
Camber shims are thin sheets of stainless steel that can be slotted between your chassis and the lower control arm.
They’re a once-and-done upgrade that requires no additional tinkering. All you have to do is loosen a few bolts and slot them in. You can also stack shims for more angular displacement. Additionally, these can also be used for increasing caster angle at the front wheels.
Depending on the car they’re made for and what suspension it comes with, expect the shims to have different shapes and sizes.
Alignment is Everything

Most camber kits available on the market have everything you need to adjust your front and rear camber angles. You’re going to want to understand what type of suspension systems you have in the front and rear, and then make a judgment call on which is the best way to adjust camber for your specific application.
It’s worth noting that camber correction shouldn’t be an afterthought, instead, we recommend planning your suspension upgrades all at once. If you’re on a tight budget, consider building a list and starting with the least invasive upgrades first.
While you’re here, feel free to check out our diverse range of wheels and aftermarket suspension components. Browse through a variety of coilovers, sway bars, adjustable control arms, roll centre correction kits, and lots more.
