

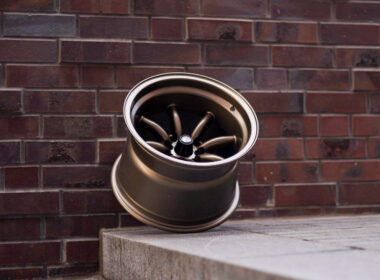

Whether you own a commuter or a track-car, nobody likes uneven tire wear and poor handling; they’re clear signs of incorrect camber and wheel alignment in general.
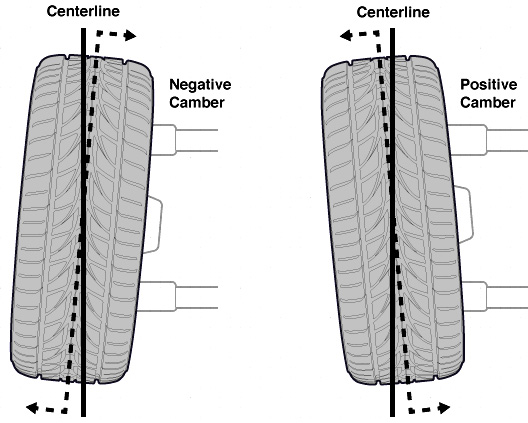
Camber refers to the off-vertical tilt of your wheels. If the top of your wheels are tilted inwards, then you have what’s called negative camber. If they’re tilted away from the car, you have positive camber.
For road going cars, the camber angle is usually corrected as part of a routine realignment service which also deals with caster, toe, and thrust.
But when it comes to race cars, the ability to alter individual suspension angles easily and frequently is quite a necessity. Even more so if the race car doubles up as a daily driver.
However, camber is not the be all end all of wheel alignment. Other suspension angles also significantly impact the way your car drives, but more on those in another article.
In this guide, we’ll walk you through the basics of camber adjustment, why you’d want to adjust it in the first place, and the tools required to get it done.
What Camber Does and Why to Adjust It

Poor handling and excessive tire wear is indicative of mismatched camber angles. When your wheels go out of alignment, your car will tend to pull towards the side that has the most positive camber.
Excessive negative camber typically wears the inside part of the tires, while positive camber wears out the outside edges — that’s something to look out for if you’re unsure whether you need to get your camber angle corrected.
However, some cars with high negative camber and properly aligned toe angles don’t experience this issue. It’s worth noting that most sports-oriented cars typically feature a small amount of negative camber from the factory.
If your driving style demands better cornering performance, you want more negative camber as it will help to maximize traction by increasing the contact patch in tight corners.
Look at any car when it’s mid-corner and you’ll notice that the cornering force causes the lead tire to lean over itself. When that happens, the outer edge of the tire ends up doing most of the work, which diminishes the contact patch and the traction as a result.
In that situation, all you need is a bit of negative camber to offset the cornering forces and flatten the contact patch as much as possible.

Positive camber, on the other hand, is most suitable for SUVs and overlanding vehicles. It causes the car to pull to each side, making it easy to maneuver over uneven terrain.
Here are some of the ideal wheel camber angles for different usage scenarios:
0° to -0.5°: Drag racing
-1° to -2°: Spirited driving
-2° to -3°: Competitive use
-3° to -6°: Drifting
-7° to -10°: Purely aesthetic
How to Adjust Camber Angle?
Camber angle is typically adjusted as part of a complete wheel alignment service which is typically performed on a leveled alignment rack.

The wheels are equipped with optical reflectors which are detected by laser sensors. A computer then interprets the information to gauge the position and deflection of all 4 wheels.
Considering how expensive and impractical it is to setup something like this for personal use, it makes sense to rely on these services for routine alignments.
All cars have to undergo wheel alignment at regular intervals anyway. Each manufacturer specifies pre-defined suspension angles for optimal performance.
These specifications need to be followed unless you’ve modified your suspension by installing aftermarket parts or if you’re wanting to set it up in a very particular way.
After installing aftermarket suspension components such as coilovers or adjustable control arms, the wheel alignment usually goes out of whack and needs to be re-done.
We recommend relying on wheel alignment services for routine maintenance and also familiarizing yourself with DIY adjustments for the occasional camber tweak before a canyon run or a track day.

Adjusting your own camber is the easy part. What’s difficult is setting up your garage or driveway to do it properly. There are many ways to approach it.
Regardless of which method you choose to align your wheels and change your camber angle, you will absolutely need the following:
- A perfectly leveled surface: If your garage floor is not leveled, you can either get it done professionally as it will come in handy in the future, or you can make a level platform.
- Spirit level gauge or inclinometer: To measure wheel angle deflection as you make adjustments.
- Turn plates: A smooth, frictionless platform that your wheels can freely turn on. This is necessary because the adjustments you’re making need to reflect on your inclinometer or spirit level gauge.
Remember to get your car corner balanced before adjusting your camber angle and also ensure that all 4 of your tires are equally inflated.
How you should go about adjusting your camber depends on the type of suspension setup you have on your car.
Double wishbone suspensions, multi-link independent suspension, and McPherson struts, all have different parts that allow for camber adjustability.
Most OEM suspension systems offer some level of camber adjustability through eccentric bolts, turn-buckle joints, or shims.
Camber Bolts
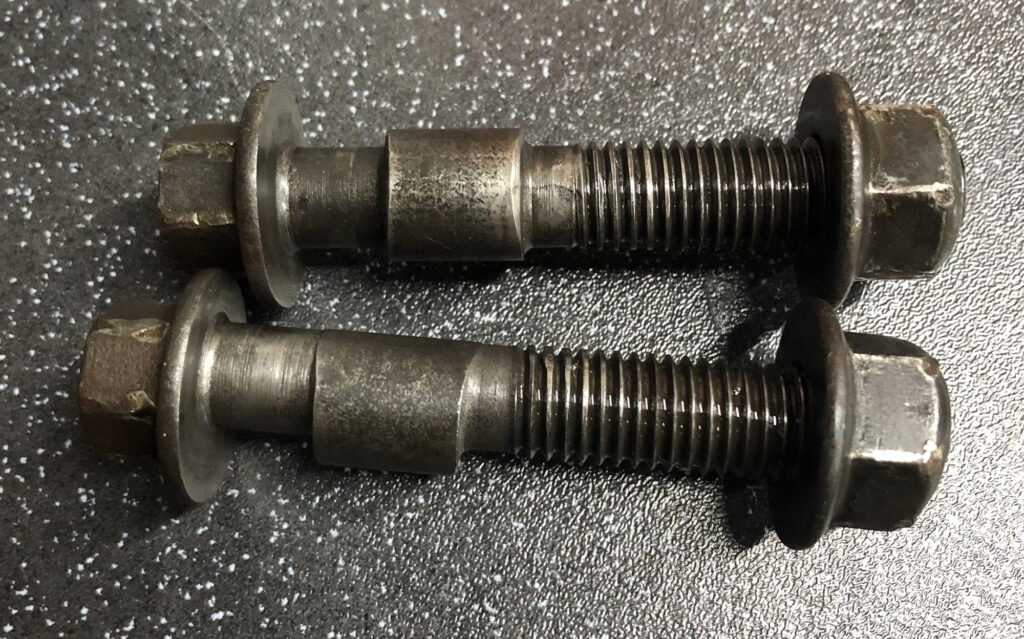
Camber bolts feature an offset washer paired with an eccentric lobe. Turning the bolt affects the alignment of either the steering knuckle or control arms depending on the suspension type.
On double-wishbone and multi-link independent suspensions, these can be used to move the upper or lower control arms.
Similarly, on McPherson struts, these can be used to adjust the steering knuckle or the lower control arm.
Turn-Buckle Joints and Shims
Turn-buckle joints are commonly seen on rear multi-link and front double-wishbone suspension systems.
Aftermarket shims can be used to correct solid axles on rear suspensions by offsetting the entire wheel bearing and hub assembly.
Camber Plates
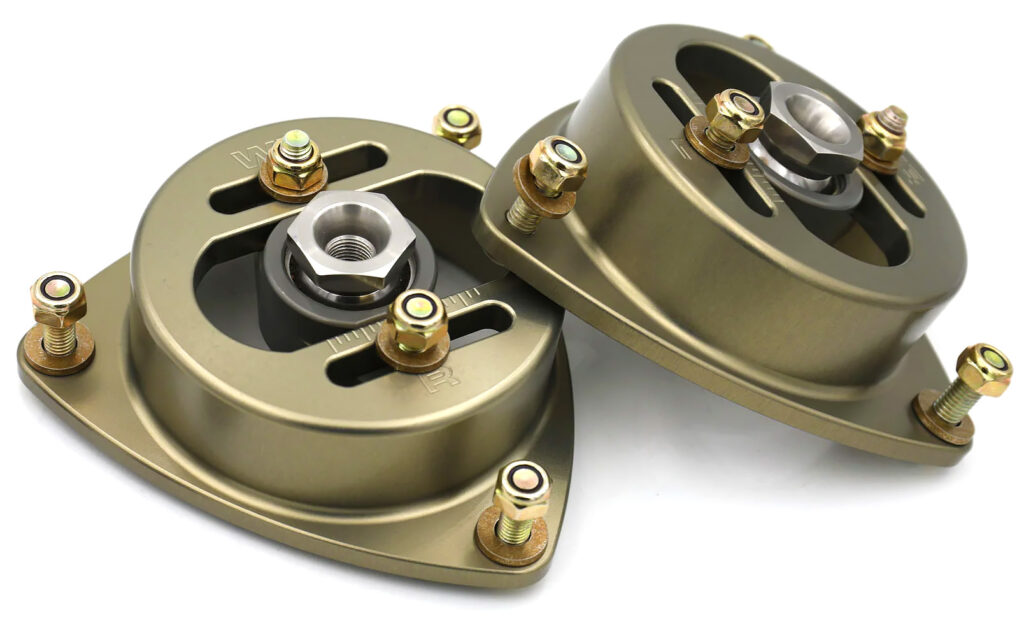
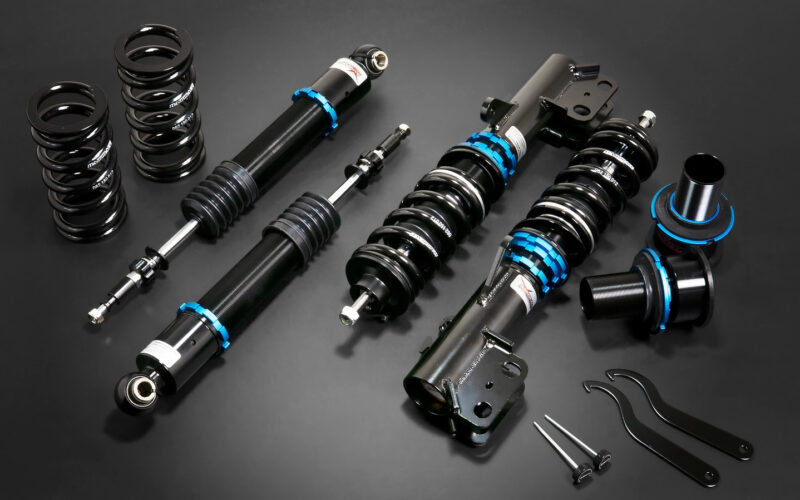
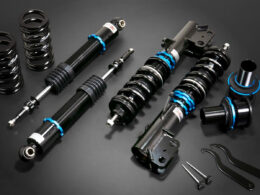
Camber plates are an excellent solution for easy, on-the-fly camber adjustments. These are OEM-replacement strut mounts that are fully adjustable, and they’re typically used to adjust front camber.
They allow you to move your coilovers or struts towards or away from the car, which effectively alters your camber and also caster if required. All you need to make the adjustment is an Allen wrench.
Unlike camber bolts, camber plates allow for a wider range of adjustments. Bolts max out at 1.5°, while plates allow for 2° to 3°.
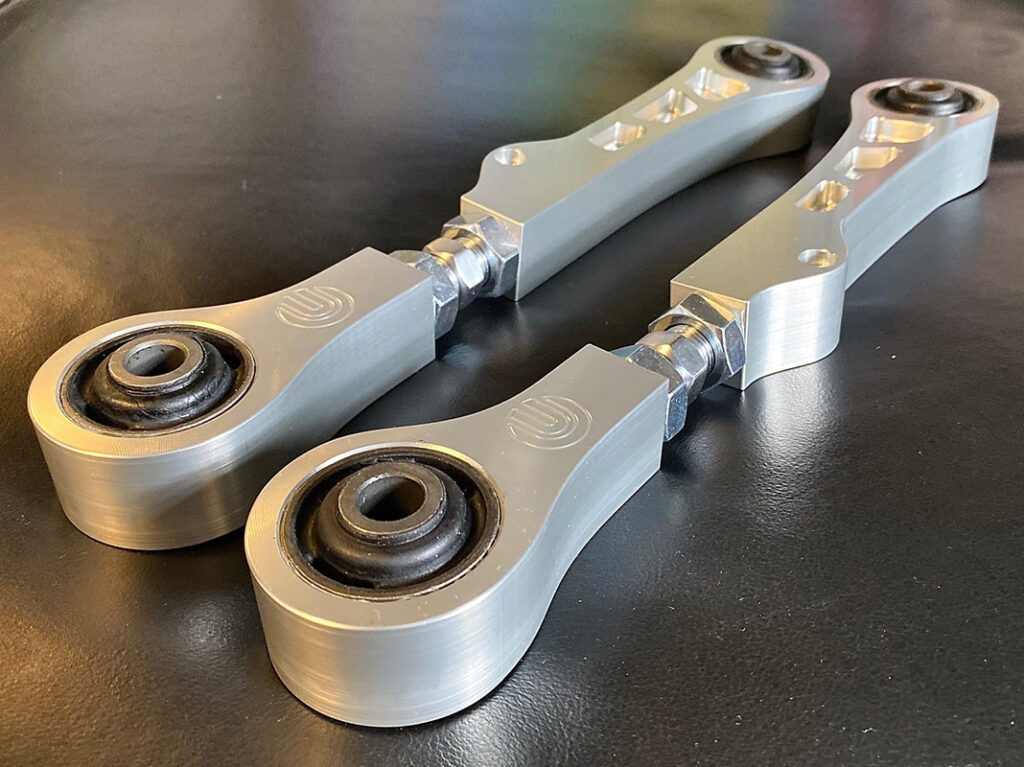
Adjustable Control Arms

Unlike rigid OEM control arms, you can adjust aftermarket control arms by changing their length. They’re extremely effective when it comes to changing your camber angle; even more so than camber plates.
Adjustable control arms are compatible with several different types of suspensoon systems, making them versatile and dependable.
The way you adjust them is by fine tuning the threaded collars or adjustable rose joints, depending on which style you buy. By lenghtening or shortening the control arm, you can change the angle of your steering knuckle.
Adjustable control arms are often installed on double-wishbone-equipped cars that are lowered using coilovers. When you lower your car, it gains some unwanted negative camber which needs to corrected using aftermarket control arms.
Camber Bushings
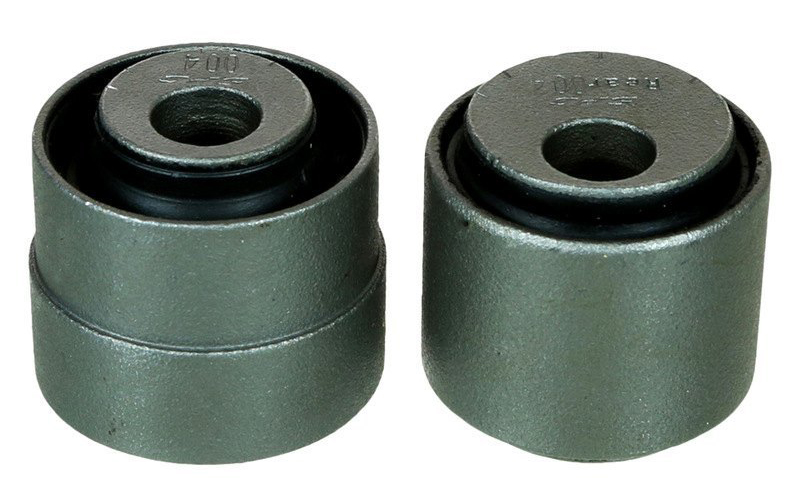
Even though aftermarket camber bushings aren’t the most reliable way to adjust your camber angle, they’re often used on trucks and off-road vehicles.
Similar to camber bolts, they feature an offset design which allows you to fine tune your camber angle. Emphasis on fine tune, becuase these are more of a touch-up solution rather than something like camber plates or adjustable control arms.
Camber Arms
Camber arms and adjustable control arms are usually sold together as a front and rear camber kit. The arms can be adjusted in length because they’re threaded.
Essentially they do the same thing as adjustable control arms, the only difference is that they’re meant for rear suspensions, because they replace the rear control arms and allow you to adjust rear camber.
Concluding Thoughts

Before making any changes to the length and angle of any of your suspension components, you need to understand that you’re going to make unintended changes to the geometry of your suspension setup.
After installing adjustable control arms, camber plates, bushings, or even simply lowering your car, you’re going to want to get a proper wheel alignment and even get your car corner balanced.
If the Onikyan (demon camber) look is what you’re after, by all means, go for it. There’s nothing wrong with modifying your car the way you want to.
However, it’s worth being mindful about the fact that anything beyond -10° of camber is going to require invasive mods — some of which might not even be reversible. So be sure to thoroughly research your project car and get the mod done by an experienced technician.
Got more questions about camber? Leave them in the comments section below.
If you find this article useful, please do share it with your friends on Reddit or Facebook. We appreciate your support!